Learn how to service your motorcycle at home with simple steps and basic tools. Save money, understand your bike better, and keep it performing at its best with this complete DIY motorcycle maintenance guide.
Subscribe to our Telegram channel for instant updates!
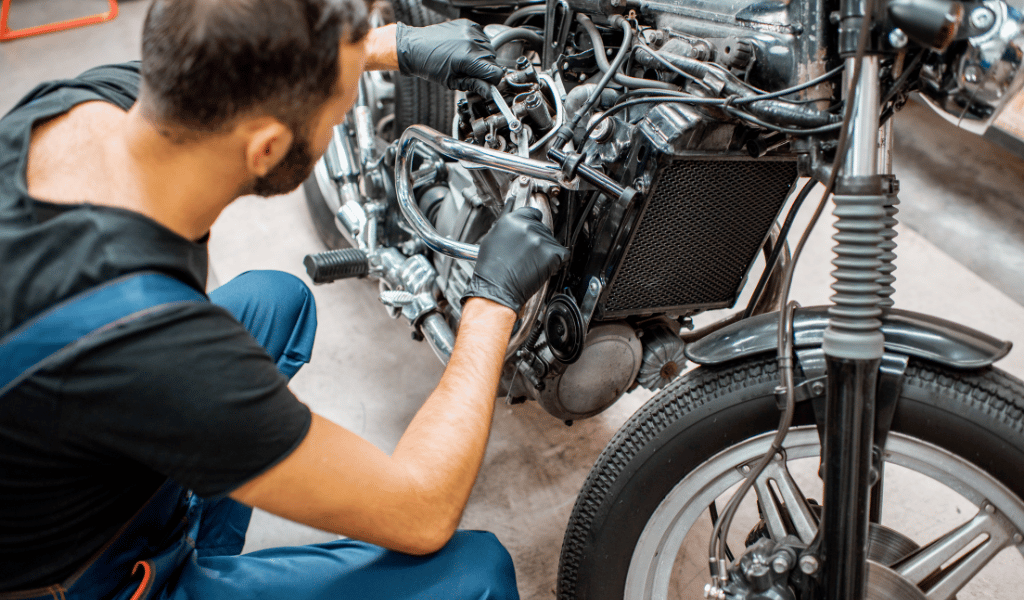
There’s a certain satisfaction that comes with working on your own motorcycle. The smell of fresh engine oil, the sound of a chain running smooth again it’s all a part of the joy in riding. Servicing your motorcycle at home not only saves money, but also helps you to understand your machine better. And the truth is, you don’t need to be a mechanic to do it right. With a few tools, a clean space, and a bit of patience, you can keep your bike in tip top condition all by yourself.

1. Preparation Before You Start
Before diving in, get your workspace ready. Make sure you have:
- A set of basic tools (wrenches, screwdrivers, socket set)
- Engine oil and oil filter that match your bike’s specs
- Chain cleaner and lubricant
- A funnel, drain pan, and rags for cleanup
Find an area that is leveled and well-lit to work on, ideally with the bike on its main stand or paddock stand. It’s also smart to check your motorcycle manual for the suggested oil type, torque settings, and maintenance intervals as every bike has its own needs.
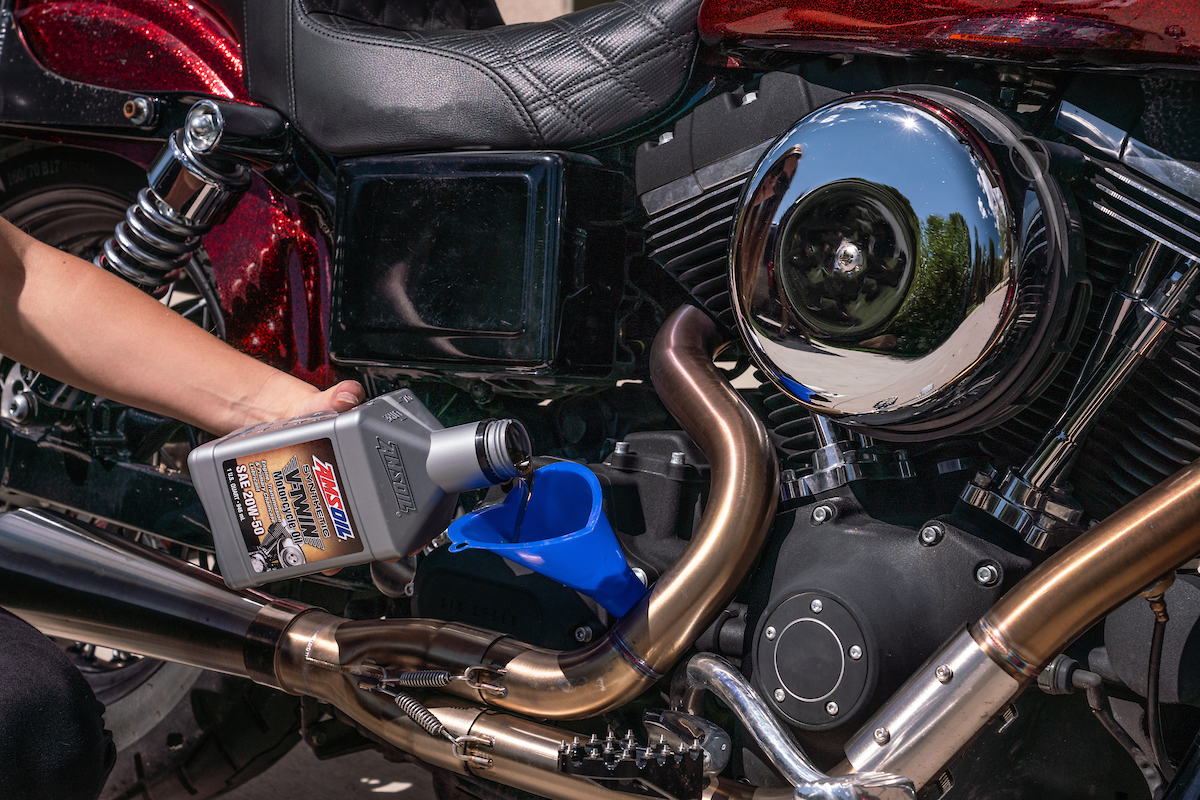
2. Change the Engine Oil
Engine oil is your motorcycle’s lifeblood. It keeps everything lubricated and cool. Most riders should change their oil every 3,000–5,000 km, or sooner if they ride hard or often in hot conditions.
Start by warming up the engine for a minute or two as this helps the oil drain more easily. Remove the drain bolt, let the old oil flow out, and replace the oil filter if needed. Once it’s done, pour in the new oil using a funnel and check the level using the dipstick. Clean up any spills and make sure there are no leaks coming from the engine.

3. Clean or Replace the Air Filter
A dirty air filter makes your engine work harder and reduces performance. Depending on your bike, the air filter could be under the seat or behind a side cover. If it’s a foam or cotton type of filter, you can clean it using mild soap and let it dry completely before reinstalling. If it’s a paper type of filter, it’s best to replace it entirely. This small step can make a big difference in fuel efficiency and throttle response.
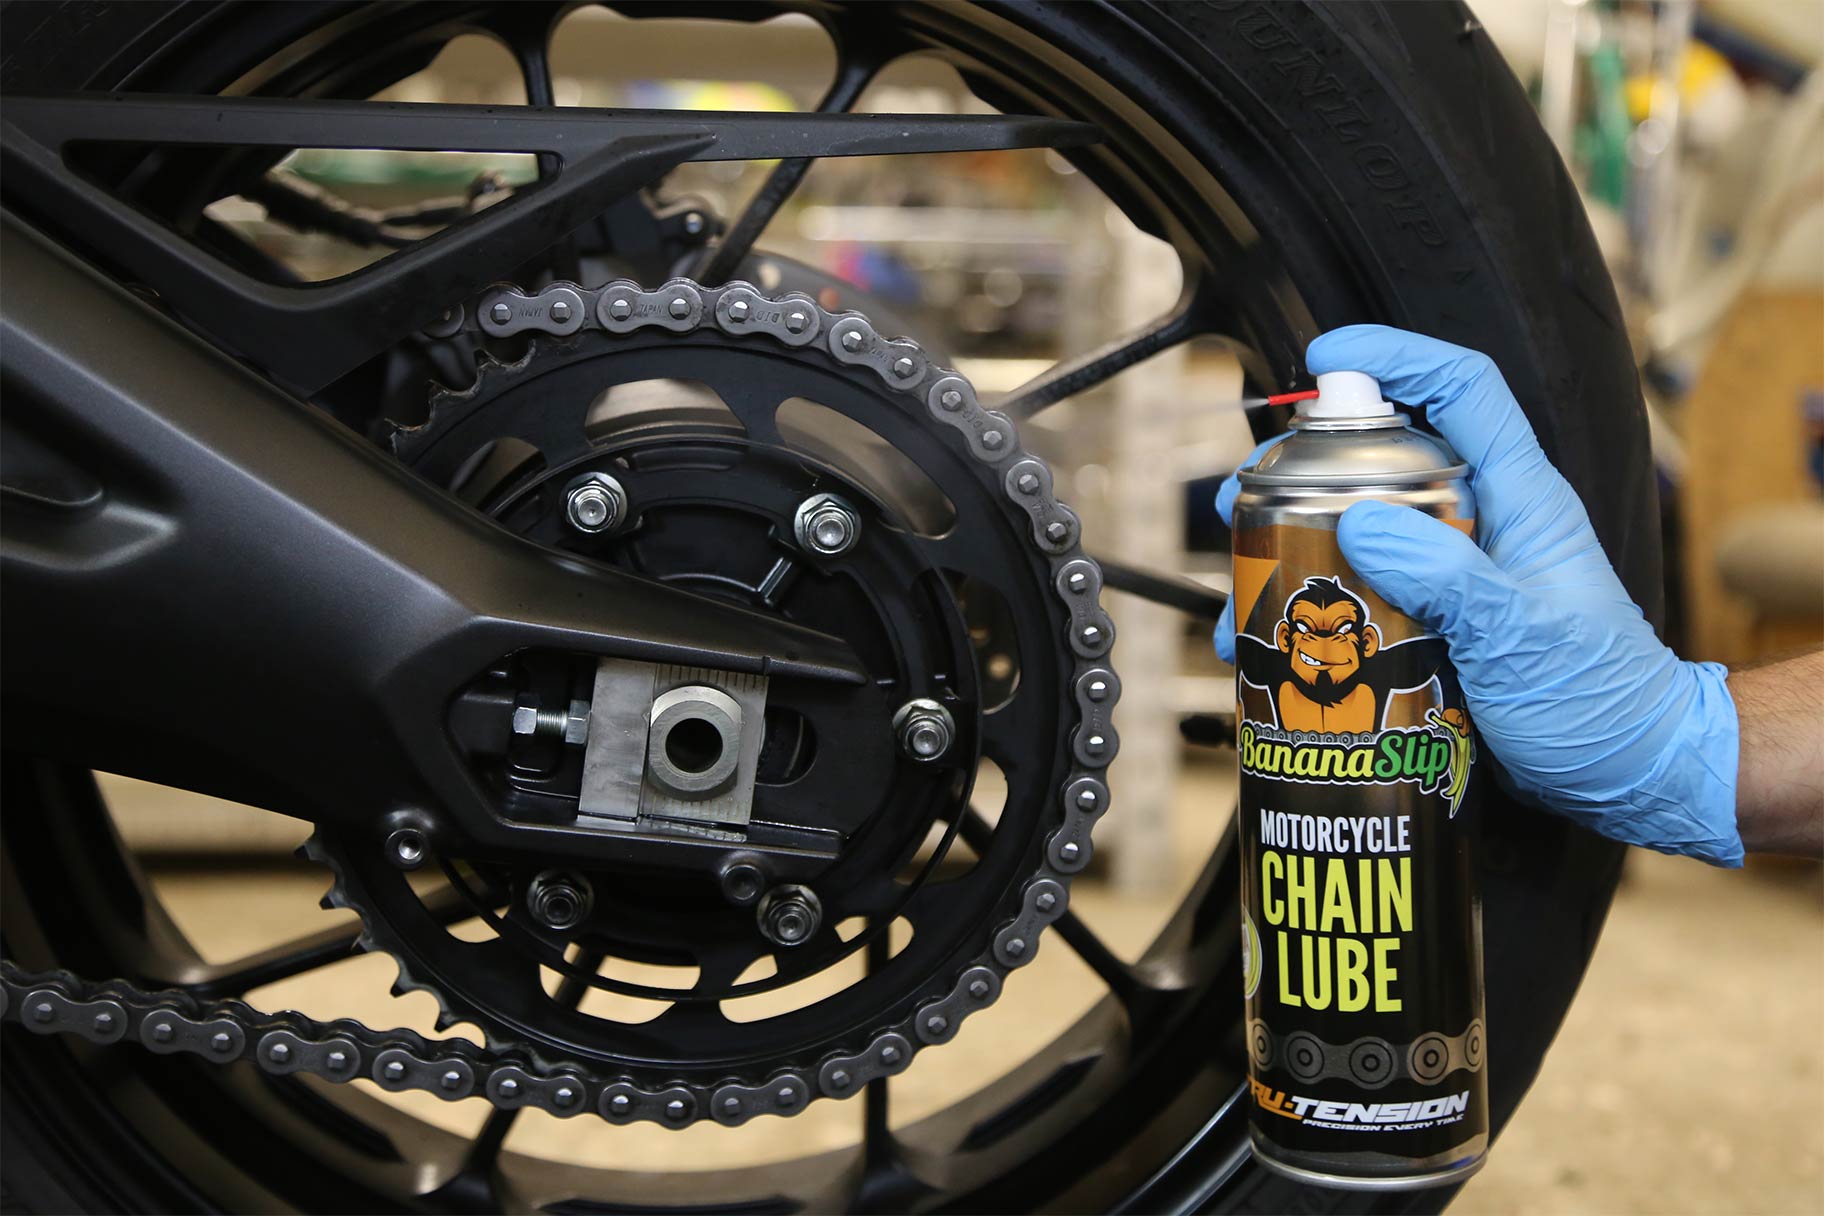
4. Check and Lubricate the Chain
A noisy or dry chain is a clear sign it needs attention. Start by cleaning the chain with a brush and chain cleaner. Avoid in using petrol to clean your chain as it can damage the O-rings. Once the chain is clean, let it dry and apply chain lube evenly while rotating the wheel. Also, be sure to check the chain tension. A chain that is too tight or too loose can affect your ride quality and even damage the sprocket. Most bikes have markings near the swingarm to help you get it right.
5. Inspect Brakes and Brake Fluid
Brakes are something you should never compromise on. Check the brake pads through the caliper. If the brake pads are already worn close to the metal, it’s time to replace them. Also, inspect the brake fluid level in the reservoir. The fluid level should be between the minimum and maximum marks. If it looks dark or dirty, it’s due for a change and it is usually for every 1–2 years. Fresh brake fluid ensures consistent braking performance, especially in emergency situations.

6. Check Tyres and Battery
Tyres are your only contact with the road, so make sure they’re in good condition. Look for any cracks, uneven wear, or embedded nails. Use a tyre pressure gauge to check if the PSI levels are according to your bike’s specification. You can check the recommended specification in the motorcycle’s owner’s manual. For the battery, ensure that the terminals are clean and secure. If your bike isn’t used that often, consider getting a trickle charger to help keep the battery in a healthy state.

7. Final Check and Test Ride
Once you’ve gone through all the steps, give your bike a gentle wipe-down and double-check that everything’s tightened and in place. Then, take it for a short test ride. Pay attention to how the clutch feels, how smoothly it shifts, and whether the brakes bite properly. If everything feels right, congratulations, you’ve just serviced your motorcycle yourself.
Conclusion
Doing your own motorcycle service isn’t just about saving a trip to the workshop, it’s also about getting closer to your machine. When you get to know how each part works, you’ll ride with more confidence and spot problems before they become major. Start small, take your time, and soon, home servicing will feel like second nature.


Facebook
Instagram
X (Twitter)
YouTube
LinkedIn
RSS